Using Images on the Web
Introduction
With a firm grasp on the structural components of HTML, we
now turn our attention to the use of images on the Web. In
lecture, we’ve discussed the different types of image file
formats and how to choose amongst them. While it is important
to understand the implications of choosing an appropriate
image file format, it has no bearing on the
mechanics of how we utilize images in our pages.
This page was written to provide students in my CS403 class
with a simple sample document that demonstrates the use of
images that we have discussed in class. As with the other
sample documents I have provided, the primary motivation
has been to generate a relatively simple, but realistic,
document that not only reviews the concepts presented in
lecture, but also demonstrates their use in a
real world
situation.
To get the most out of this document, you should first read
it and then study the source that the browser rendered in
order to produce it. Use your browser’s ability to display
the source of a document for this purpose.
Inserting images
Use the <img /> element to insert images in your Web
pages. This element requires both a src attribute
and an alt attribute. The value of the src
attribute tells the browser the URL of the image to retrieve and
render. The value of alt attribute is a textual
alternative that the browser can use in place of the image, if
needed.
Consider the following JPEG image:
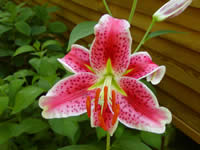
Note that it is both preceded and followed by explicit line breaks,
within this paragraph. The line breaks are necessary in order to
force the image to be on a line by itself. Each image must be part
of a block, which is why I included it inside this paragraph. I
might also choose to use a heading or <div> element as a
container for my images.
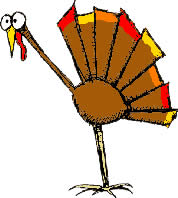
If I hadn’t preceded and followed the <img /> element in the
above paragraph with explicit line breaks, it would have been
included within the text of the paragraph as an (extraordinarily
large) character. For example, this
is the same image without the explicit line breaks preceding
or following it. As you can see, it appears in the middle of one
of the lines of this paragraph, forcing the line spacing for that
line to be quite different from the line spacing of the rest of
this paragraph.
Accessibility
Images on Web pages present special challenges for blind and low
vision users who may be using a screen reader, rather than a visual
browser. To assist such users, the <img /> element must have
an alt attribute in addition to the src
attribute used by visual browsers. The value of the alt
is expected to be a textual alternative to the image that a browser
or screen reader may use in lieu of the image itself.
Remember that the primary
purpose of this attribute is to provide some text that can be read by
text-only browsers and screen readers. For this reason, be careful that
the values of your alt attributes are a functional
alternative to the image. In many cases, a description of the
contents of the image will serve this purpose. However, don’t assume that
a simple description of the image will always suffice. For example, imagine
using a right-pointing arrow to indicate the way to the next page. Users
of visual browsers will see the arrow and are likely to understand its
implied meaning. However, a user of a screen reader might not ascribe the
same implied meaning to the words A right-pointing arrow
.
In this case, the words Proceed to the next page
might
be a more appropriate choice of alternatives.
For similar reasons, images which do not
contribute to the content of a page, should not have any textual
alternative. Since all <img /> elements must have an alt
attribute and all attributes must have a value, the way to handle this
situation would be to use alt="". The empty set of quotes
(and they must actually be empty, without even a space between them)
tells a browser or screen reader that this image has no alternative and
can therefore be safely ignored.
Specifying height and width
It is possible for a browser to determine the dimensions of an image by
examining the contents of the image file that contains that image. However,
in order to examine the contents of this file, the browser must wait until
it has retrieved the file from the server. For large images, this retrieval
can actually take some time.
Some browsers wait until they know the size of each image before
proceeding with the rendering of a page. This is undesirable because
it makes it seem like the user is having to wait longer for the page to
load. (Try looking at a blank window for one minute and then try looking
at a window containing a complete Web page for one minute. Which minute
seemed longer?)
Other browsers, will render the page before all the images have been
retrieved and fill the images in as they become available. If the browser
doesn’t know the dimensions of each image, it can’t know how much
space to leave for them. As such, this approach is less than ideal, since
each image that appears is likely to cause the current contents of the
window to be rearranged. (Give a friend an opened book, tell them to move
it every three seconds, and try to read a single page. This roughly
approximates the experience of having the browser rearrange the page
every time a new image is retrieved.)
One way to avoid both of these situations is to use the <img />
element’s height and width attributes
to tell the browser the dimensions of each image. If it can tell the
dimensions of each image before it has retrieved those images from
the server, a browser can proceed with the rendering of the page,
leaving appropriate space for the images. The images can then fill into
the appropriate spaces as they are retrieved from the server without
causing any shifting of page contents. The net result is that user has
something to look at much sooner, and if they begin reading they will
not lose their place every time an image arrives from the server.
It is not necessary to tell the browser the actual dimensions of an
image. If you give the browser incorrect dimensions, the browser will
simply scale the retrieved image to fit the specified dimensions.
This, however, is generally not advisable. Browsers are not image
editors, and therefore they cannot be expected to invest tremendous
effort in rescaling images. As such, the results of allowing the
browser to scale your images on the fly
are likely
to fall far short of using any self-respecting image editor for the
same purpose. You’ll typically get far better results by rescaling
the image to the desired size with an image editor, saving it into a
separate file, and telling the browser the actual dimensions of the
image stored in that file.
Comparing image file formats
Many different image file formats have been developed over the years.
However, only a small number of them are suitable for use on the Web,
where a balance between image quality and file size is of paramount
importance.
All recently current visual browsers should be able to display
JPEG,
GIF, and
PNG images.
JPEG is best
used for photographs, photo-realistic images, and any
other image where large numbers of subtly distinct colors are
required. GIF
and PNG
are best used for everything else. This would typically
include icons, line drawings, diagrams, logos, flow charts,
graphical text, and any other image with a limited range of colors
and well defined shapes of homogenous color. The vast majority
of images on the Web are one of these image file formats.
Consider the following examples:
JPEG (filesize 9KB)
 GIF (filesize 21KB)
 PNG (filesize 19KB)
Most users would not be able to distinguish any difference in the
quality of these images. However, all users would benefit from
the fact that the
JPEG image is less than half the size of the
GIF or
PNG images.
For comparison sake, consider the following examples:
 JPEG (filesize 10KB)
 GIF (filesize 5KB)
 PNG (filesize 5KB)
Again, most users would not be able to distinguish any difference in the
quality of these two images. However, all users would benefit from
the fact that the GIF
and PNG
images are less than half the size of the
JPEG image.
Admittedly, there is little difference in the time it takes to retrieve 5KB
or 10KB from a server, even on a slow connection. However, those relative
differences in file size can become quite noticeable for larger, more complex
images and/or pages that contain many images.
Optimizing images
Before you use any image in a Web page you should give some consideration
to how you intend to optimize it. Optimizing images involves striking a
desirable degree of balance between the size of the image file and the quality of the
image. The first step in optimizing an image is choosing the appropriate type of image
file format when saving it. As explained above, JPEG files are best suited to storing
photographic images, while GIF and PNG files are appropriate for everything else.
Image dimensions
As discussed above and in lecture, the dimensions of an image are important
for two reasons. First, and most importantly, the dimensions of the image
directly determine the number of pixels that image contains. Storing more
pixels requires more storage, so images with bigger dimensions produce
larger image files. We want to keep the size of each image file to a minimum
to reduce the bandwidth requirements for our server and the time a user
must wait for the image to appear. Second, the dimensions of an image should
be pre-announced to the processing agent (i.e., browser) in the XHTML code
(using the height and width attributes of the <img
/> element) so that
adequate space can be reserved for the image. Providing dimensions for
each image can allow the processing agent to display a stable page much
earlier than it might otherwise.
Consider the following JPEG image taken with a digital camera:
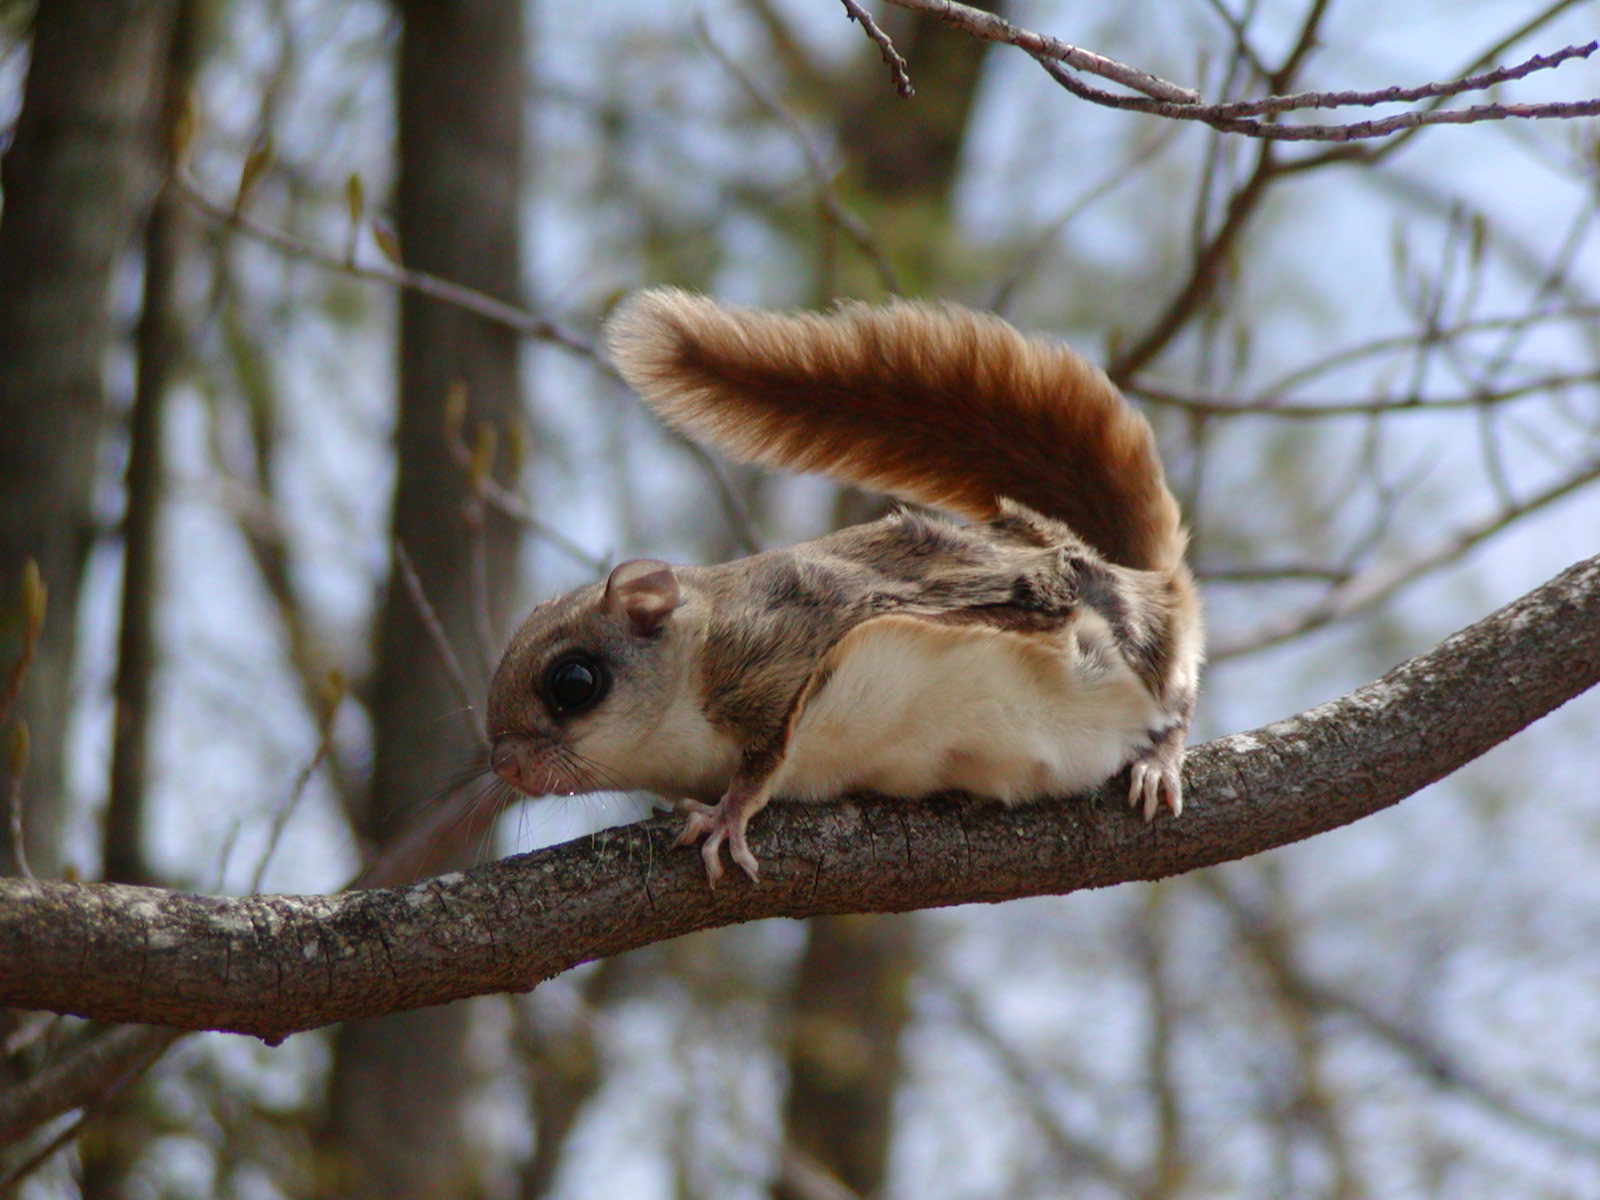
It’s a reasonably nice picture, but it’s way too big. It won’t fit
within a typically sized browser window, and it requires about 360KB of storage.
Many beginners would address the first problem (too big for most windows)
by adjusting the values of the height and width elements as
below:
JPEG - same as above with adjusted height and width
(filesize 359KB)
This appears effective, but does not do anything about the second problem
(the large size of the file). It’s still the same image file. However,
now the browser is being asked to download all the pixels and then immediately
throw most of them away (since the smaller image requires far fewer pixels
than the file that was transferred from the server. The user still has
to wait just as long, but they get even less out of the deal! Therefore,
a much better solution would be to adjust the actual dimensions of the
image using a graphic editor (such as IrfanView
or iPhoto) to adjust the image dimensions and then save a fresh copy of the smaller
image in a different file.
Cropping
Since we’re going to be modifying the image anyway, we might as well
take the opportunity to crop it a bit. Cropping an image is the
process of eliminating parts of it that we don’t want or need. If you
were going to crop an actual paper photograph, you would probably use scissors
or a paper cutter. Since we intend to crop a digital photograph, we will use
a graphic editor.
Note that cropping an image generally also reduces its dimensions. So it
is commonly the first step in optimizing most images. Not all images can
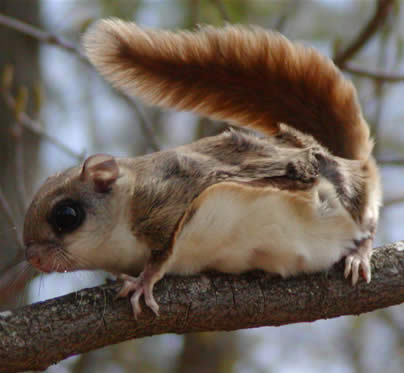
be cropped, but if we want our photo to highlight the squirrel, we can
crop away some of the background trees and branches.

JPEG - cropped (filesize 122KB)
Note that simply by cropping the image, we significantly reduced the size of the file
to 122KB. That’s because the cropping process removed a large percentage of the
pixels in the original image. Note as well (from the source code) that the value of the
src attribute value is referencing a different file than we referenced
previously. This is necessary because it is actually a different image. In fact, from
here onwards each file we reference will need to be stored in a separate file, since
they are all different (even though they may look essentially the same.
Scaling
Once we have the image cropped to our liking, we can turn our attention
to scaling the image. Scaling an image is the process of adjusting
its dimensions to better suit our needs. We might use scaling to either
increase or decrease the dimensions of an image. However, we typically
get much better results when decreasing dimensions. When we try to increase
the dimensions of an image, we are effectively asking the software to make
up additional information to create new pixels that do not exist in the
original image. As with cropping, scaling is generally accomplished using
a graphic editor and the rescaled image saved in a different file which
can then be used on the Web page.
Here is a version of the cropped image that has been scaled to a more appropriate
size:

JPEG - cropped and scaled (filesize 40KB)
Note that because our scaling reduced the dimensions of the image, it again
reduced the number of pixels it contains. Fewer pixels require less storage,
so the file size is down to 40KB, which is quite an improvement over the
360KB required by our original photograph.
JPEG quality levels
When saving photographs in JPEG files, it is important to realize that
JPEG gives you the ability to specify a quality level when saving
an image. In essence, this quality level let’s you control how much
loss the program allows when saving the image. Since JPEG uses a lossy
compression mechanism, specifying a lower quality level generally results
in more allowed loss and therefore a smaller resulting file. However, the
more loss that is allowed, the lower the quality of the image. For example,
consider the following version of the scaled and cropped image above:

JPEG - cropped, scaled and saved at quality level 30
(filesize 6KB)
This image was saved with a quality level of 30 (out of 100), which allows
a tremendous amount of loss. Notice that the loss resulted in a significantly
smaller file (6KB instead of 40KB), but also a noticeably blurry image.
Obviously, a quality level of 30 is not appropriate for this image (though
it may be for some images).
Consider this alternative:

JPEG - cropped, scaled and saved at quality level 50
(filesize 12KB)
This version was saved at quality level 50 and is twice the size of the
previous version (12KB versus 6KB), but still far smaller than the original
cropped and scaled version (12KB versus 40KB) which was stored at a quality
level of 86. And to a casual glance it looks almost as good! A careful
examination of the image, however, will show some noticeable differences.
Here is an even better looking alternative:
JPEG - cropped, scaled and saved at quality level 70
(filesize 20KB)
This version has been saved at a quality level of 70. Yet it is half the
size of the original cropped and scaled version that was saved at a quality
level of 86 and looks just as good, even upon close examination. This is
probably the version we would choose to use if the image were a centerpiece
on our page. If, on the other hand, the image was going to be one of many,
then make each image as small as you can while keeping the quality within
reason. In that case, we might choose the previous version (12KB at quality
level 50).
When optimizing images, you need to consider a multitude of factors. Think
about how you intend to use the image, and make your decisions with that
usage in mind. Always keep the original image in a separate file and remember
to derive all new versions directly from the original.
Since JPEG uses lossy compression, each time you save more data gets lost.
If you repeatedly modify and save JPEG files, the loss accumulates with
each save, and the image quality drops lower and lower.
Optimizing GIF images
In general, GIF images are best used for things other than photographs.
To see why, consider the following image:

GIF - cropped, scaled and saved with 256 colors
(filesize 93KB)
Obviously, it is possible to store photographs as GIF images. However,
the image above doesn’t look any better than the JPEG stored at a quality
level of 70 above, yet it is much larger (93KB versus 20KB). On the Web,
it makes no sense whatsoever to use a bigger file size than necessary.
If we can get equivalent quality at a smaller size, we should do so. And
therefore, it makes no sense whatsoever to store this image as a GIF file.
Because it uses a color lookup table (CLUT), reducing the number of colors
in a GIF image can reduce the file size. So let’s look at a version
of our photograph that uses half the colors of the previous example:

GIF - cropped, scaled and saved with 128 colors
(filesize 74KB)
If you look closely (especially at the background) you can see that reducing
the number of colors used also reduced the image quality. It did produce
the predicted reduction in file size, but the size is still far in excess
of an equivalent quality JPEG (see the 12KB JPEG saved at a quality level
of 50 above for comparison).
Reducing the colors by another half gives us:

GIF - cropped, scaled and saved with 64 colors
(filesize 56KB)
The squirrel remains relatively clear even with only 64 colors,
but the background really begins to degrade. And although the size has
again gone down, it’s still not in the same ballpark as the much higher
quality JPEG versions discussed earlier.
To take this to an extreme, consider the following version of the image:
GIF - cropped, scaled and saved with 8 colors
(filesize 21KB)
This version looks kind of cool, but it is certainly a much lower quality
(at least relative to the original) than the final JPEG example (saved
at a quality level of 70). And yet, the final JPEG example is still a smaller
file! That’s why we generally avoid saving photographs in GIF files.
However, with other types of images (such as logos, diagrams, icons and
similar items), the tables are turned. GIF generally produces significantly
smaller files than JPEG and does so while maintaining higher image quality.
For illustration, consider the following image:

GIF - saved with 128 colors (filesize 11KB)
This is a GIF image that was saved with 128 colors and has a file size
of only 11KB. It has roughly the same dimensions as the scaled squirrel
photo we have been examining, and therefore contains roughly the same number
of pixels. Yet, the file size for this image is far smaller than even the
128-color version of the squirrel photo. The reason for this has to do
with the compression technique that the GIF format uses. This compression
technique is very effective at compressing large areas of the same color.
In a typical photograph, you seldom find large areas of a single color,
and that explains why photographs stored as GIF files are not particularly
small. However, in the image above, there are large expanses of black,
red, green and blue (as well as midsize expanses of yellow, white and magenta),
so GIF is able to compress it quite well.
For comparison, consider the following JPEG image:

JPEG - saved with quality level 80 (filesize 21KB)
Note that at this quality level parts of the image actually look a bit
better than they do in the GIF version above. That’s because the grayscale
shown along the lefthand side is a continuous gradient. There are not enough
grays available in the 128 entry color lookup table to display it accurately
in the GIF example, so banding occurs. In the JPEG version, the full range
of visible colors is at our disposal, so there are plenty of grays to show
the gradient as it was meant to appear. However, the file size is nearly
twice as large. Again, you would need to decide for yourself whether the
banding effect in the GIF version was problematic enough to warrant using
the larger JPEG version. Probably the ideal solution in this case would
be to create a custom 256 entry color table for the GIF image that incorporated
far more shades of gray than the automatic 128 entry color lookup table
that was used, but that would be a tremendous amount of work in a good
graphics editor!
While we’re looking at JPEG versions of this file, it makes sense
to look at one more example. Consider the following:

JPEG - saved with quality level 45 (filesize 12KB)
If you look closely at this version, you can see why JPEG files are not
particularly well suited to non-photographic images. In particular, notice
how gray shadows have started to appear in the white area near the middle,
and black shadows have started to appear beneath many of the color numbers.
Also note how the text has begun to get “muddy” and harder to
read. These are all the results of JPEG’s compression mechanism. So
here, we have an image file that is a bit bigger than our original GIF
version, and yet is of significantly lower quality (though the banding
in the gradient is less noticeable).
It’s worth explaining why our original GIF version used 128 colors.
At first glance you’re tempted to conclude that this image contains
relatively few colors (black, white, gray, red, green, blue, cyan, magenta
and yellow). On closer inspection you realize that there are many shades
of gray required. And yet, there don’t seem to be enough shades of
gray to avoid the banding in the gradient. Surely, with 120 shades or so
of gray, we should get less banding in the gradient. Where did all those
extra colors go?
They’re being used, but not just to display the grayscale gradient.
Many of them are being used for something called anti-aliasing.
Anti-aliasing is a technique that many graphics editors use to make the
edges of tect and other curved or slanted figures appear smoother. Recall
that an image is a grid of square pixels that are displayed in various
colors. These pixels are always square and always a single color. Using
square pixels to draw a picture of a circle (as in the diagram above) is
not going to work out very well. The edges of the circle are going to end
up looking jagged like the teeth on a saw. If one draws the same circle
with anti-aliasing, however, the jagged edges are much less noticeable,
making the edge of the circle look far smoother and more “circular.” Since
it is impossible to make the pixels anything but square or make them two
different colors at once, anti-aliasing has to rely on a type of optical
illusion. In effect, the pixels that lay along the edges of a figure are
still square and still a single color. However, the color of each pixel
along a figure’s edge is carefully calculated as some combination of
the figure’s color and the color of the background behind it. So, when
anti-aliasing the lower left portion of the green circle above, the graphics
edition makes each pixel along the edge some shade of green ranging from
the green of the circle all the way up to the black of the background.
And when drawing the edge where the green circle meets the yellow, the
editor carefully picks the color of each pixel from the spectrum between
green and yellow. By carefully picking the colors of these edge pixels
from the spectrum between two colors, the anti-aliasing process results
in the appearance of smoother edges, even though they are still composed
of square pixels.
Anti-aliasing uses a large number of different colors along the edges,
and these extra colors use up most of the colors in a color lookup table.
To see the effects of anti-aliasing, consider the following GIF image:

GIF - saved with 16 colors (filesize 8KB)
This version of the GIF file was saved using only 16 colors. That, of course,
results in a significantly smaller file size, but leaves far fewer grays
for the gradient and virtually no colors to use for anti-aliasing. As such,
we can use this version as an example of an image without anti-aliasing.
Note how messy the text looks and how jagged the edges of the circles appear
in comparison to those above. The anti-aliasing results in larger, but
much higher quality, GIF files.
Copyright 2012, by Michael Gildersleeve
Computer Science
University of New Hampshire
Durham, NH 03824 USA
amgilder@unh.edu
http://www.cs.unh.edu/cit/403/
Original turkey image obtained from CoolArchive at http://www.coolarchive.com/